Category: Blog

  • video_autoencoder

    video_autoencoder

    Video lstm auto encoder built with pytorch. https://arxiv.org/pdf/1502.04681.pdf

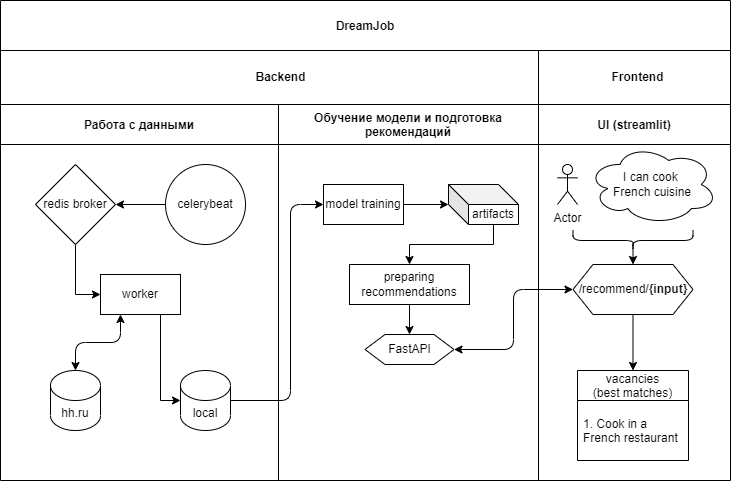
    This project auto-encodes videos by vectorizing consecutive screens of videos using an LSTM auto-encoder.

    Training data

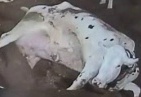
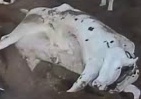
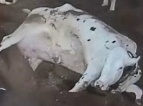
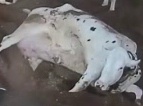
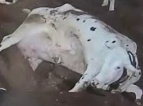
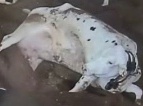
    The training data is a collection of cow screen images sampled from some videos. Per image is sampled for every 50 frames and 6 consecutive images are used as a training sample. Since the video is 30 frames / second, one training sample is a summary of movements in 10 seconds. We tried to analyze the movements of cows by analyzing the output movement vectors of the model.

    Preprocessing

    The images are vectorized using some CNNs like Resnet before input to the LSTM auto-encoder. Here, the output vector of the last full connection layer of Resnet50 is used. So every image is transformed into a 2048 dimension vector firstly. The Resnet50 is also fine-tuned using the training data.

    Learning curve

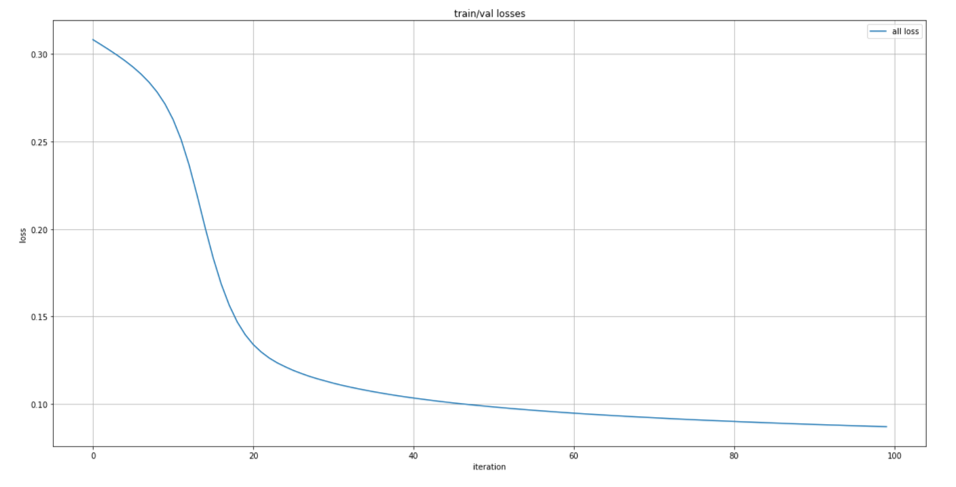
    The auto-encoder is well trained according to the following learning curve.

    Learned vector patterns

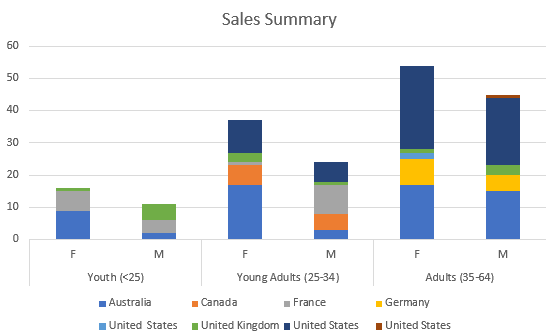
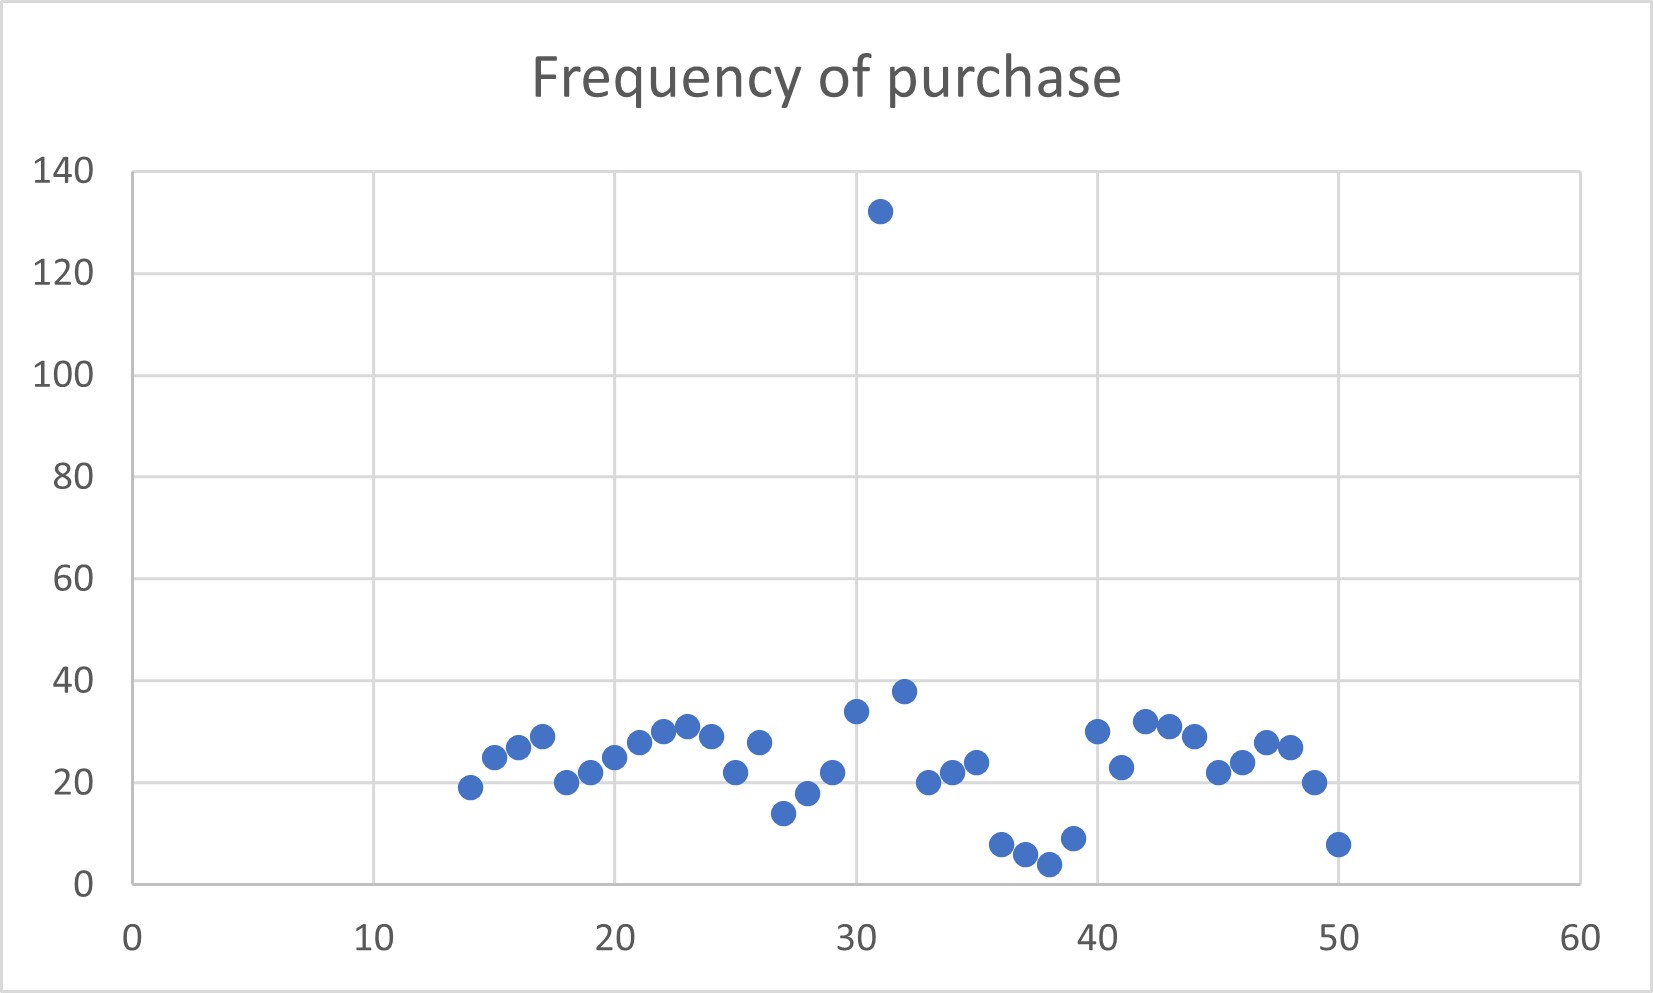
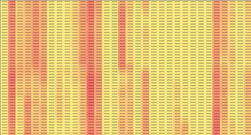
    The movement of cows in consecutive screens is vectorized by the model. The changes of colors indicate different movements of cows.

    t-SNE dimension reduction

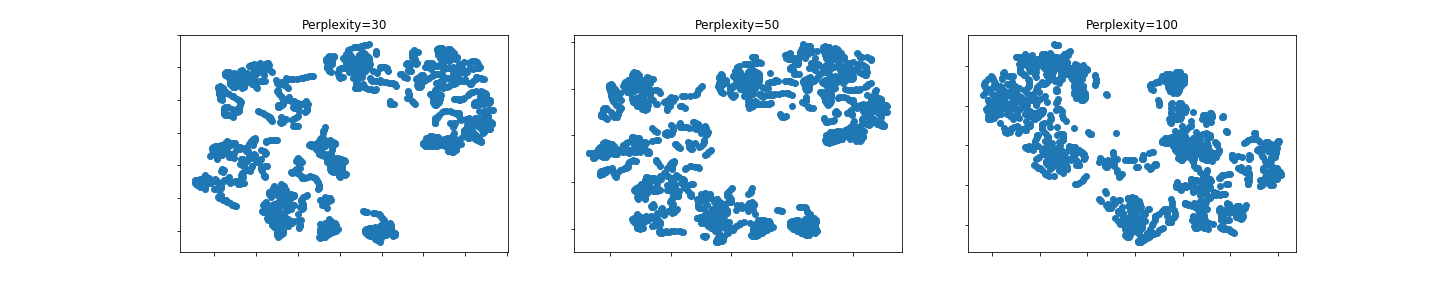
    Dimension reduction on the learned vectors according to different perplexity values.

    Clustering of dimension reduction results

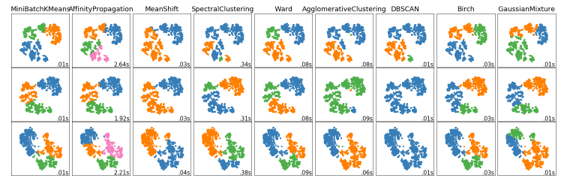
    The labels of differnet colors are automatically generated by various clustering algorithms. Differnet labels correspond to differnet movements of cows.

    Relations between generated labels and original image data

    The second clustering of Ward column is used for analyzing the labels and their corresponding images. It can be seen that differnet labels correspond to different movements of cows.

    The summary of movements can be listed as follows:

    label movement
    0 head and limbs
    1 head and belly (including cow-birth)
    2 head
    Visit original content creator repository https://github.com/shuuchen/video_autoencoder
  • dreamjob

    DreamJob

    Пет-проект для поиска вакансий по запросу пользователя. Просто опиши чем тебе хотелось бы заниматься, какие скиллы и увлечения у тебя есть, и алгоритм подберет для тебя best-match вакансии.

    Tech: python, celery, redis, FastAPI, SQL, streamlit.

    Схема проекта

    alt text

    Работа с данными

    При рекомендации вакансий важно, чтобы они были актуальными, в связи с чем возникает необходимость постоянно обновлять нашу базу данных с вакансиями. Помимо этого, желательно, чтобы процесс парсинга данных и ее загрузки в БД не мешал основной функциональности сервиса, то есть работал в фоновом режиме. Все эти проблемы прекрасно решает celery – инструмент для управления очередями задач.

    Как это устроено на примере данного проекта. У нас есть celerybeat – это планировщик, который отправляет сообщения с задачей выгрузить данные по вакансиям с hh.ru и загрузить их в локальную БД на выполнение нашему брокеру (redis). Сообщения отправляются ежедневно в одно и то же время. Брокер принимает сообщение с задачами и распределяет их между воркерами (в нашем случай количество воркеров одно), то есть брокер выступает в качестве централизованной системы. Воркер принимает сообщение и выполняет задачу отдельно от основного функционала проекта.

    Таким образом, наша БД постоянно обновляется, при этом не мешаяя основному функционалу. Более того, в случае если при выполнении таких задач выкинет ошибку, сам сервис не упадет.

    Обучение модели и подготовка рекомендаций

    Логика рекомендаций вакансий заключается в сравнении запроса пользователя с описаниями вакансий. Для решения этой задачи будут использованы следующие алгоритмы/подходы: tf-idf, sentence-bert. В проект пока внедрен только tf-idf.

    И так, используя данные, которые мы периодически обновляем с помощью celery, обучается модель. Обучение модели происходит пока в отдельном ноутбуке (в будущем будет также реализован как celery task). Саму модель и ее артефакты сохраняем для эффективности работы во время рекомендаций в онлайне.

    Связь backend’а с frontend’ом проходит благодаря api, реализованного с помощью FastAPI. В проекте только одна функция – рекомендация вакансий, соответсвенно для нее и реализован один endpoint.

    Frontend с помощью streamlit

    Интрефейс приложения реализован с помощью streamlit. Очень удобный фреймворк для создания ml и ds проектов.

    Visit original content creator repository https://github.com/Sarvar-Anvarov/dreamjob
  • devops-opsworks

    Custom Chef Recipes for Amazon Opsworks

    These scripts were coded to load test various infrastructure configurations.
    For example Nginx as a Loadbalancer, or Basho-Riak as a database server.

    The application servers run Python-Django.

    cookbooks are written as wrappers around the underlying cookbooks from Supermarket.

    In case you use ELB as a loadbalancer and a fixed number of database servers these scripts are of little help.
    Or as a picture, if your stack looks like this:

                       ELB
                        |
        -------------------------------------
        |          |            |           |
     AppServer   AppServer    AppServer    AppServer
        |          |            |           |
        ------------------------------------- 
                       |
                 Database Server                 
    

    Features

    • elastic scaling – add and remove any instance in any layer without the need of manual changes in configuration files and re-deploy of those files
    • run “commands”
      • restart all instances in a layer
      • drop all data and re-create the databases with fixtures
    • deploy Gatling for Stress- and Loadtest – for example Gatling uses the configured Loadbalancer

    Not supported

    • rolling deploy – zero downtime when deploying a new version of the application
    • seamless transition during add/remove of any instances – for example an app server instance is shutdown before the loadbalancer removed the instance from its inventory

    How it works

    1. Opsworks has the concept of life cycle events which trigger custom Chef recipes.

    2. Information about the layers and instances is provided at runtime by Opsworks.

    layers = node[:cloud][:layers]
    this_instance = node[:cloud][:instance]
    this_node = node[:cloud][:this_node]
    my_layer = node[:cloud][:my_layer]
    1. Deployment of an appliction generates the deploy life cycle event and the name of the application is available at runtime

    applications = node[:deploy]
    applications.each do |app_name, deploy_info|
    	...
    end
    elastic scaling

    Whenever a life cycle event occurs on a layer a custom recipe is called on each instance of the layer.
    The custom recipe reads the information of the current instances in all layers and for example uses this information to re-write a configuration file, to deploy the file and to restart an application server.

    commands

    To add a new “command” a new application is setup in Opsworks and code is added to run the appropriate custom recipe for deploy.

    Get Started

    Configure Opsworks Layers

    Configure Custom Recipes

    configuration of the recipes is done using custom json in the Stack Settings and attributes of the cookbooks.

    in the ri_base attributes

    change default.rb

    • <your-domain>
    • <your-s3-folder>

    Python-Django Services

    change services.rb

    Opsworks Cookbooks

    clone the cookbooks from opsworks-cookbooks

    git clone git@github.com:aws/opsworks-cookbooks.git
    

    Run and test on Vagrant

    create the vagrant box for Chef Solo provisions

    vagrant up
    

    edit the Vagrantfile to either run a defined runlist from runlist.rb or a single custom recipe.
    start the provision with

    vagrant provision
    

    Run on Opsworks

    Configure the layers such that the appropriate custom recipes are called for all of the life cycle events.

    Visit original content creator repository
    https://github.com/RawIron/devops-opsworks

  • Introduction-to-Excel-for-data-analysis-and-visualisation

    Bike Sales Analysis

    Table of Contents

    Project Overview


    This data analysis project aims to provide insights into the sales performance of a Bicycle company in the year 2021. By analysing various aspects of the sales data, we seek to identify trends, make data-driven recommendations, and gain a deeper understanding of the company’s performance.

    Sales Summary

    Data Sources

    Sales Data: The primary dataset used for this analysis is the “bike sales.csv” file, containing detailed information about each sale made by the company.

    Tools

    Data Cleaning

    In the initial data preparation phase, we performed the following tasks:

    1. Data loading and inspection
      • The Extract, Transform and Load (ETL) process.
    2. Data cleaning and formatting.
      • Fixing and Removing Duplicates.
      • Handling missing values.
      • Conditional Formatting.
      • Data Parsing from Text to Column.
        =TRIM()
        =LEN()
      

    Exploratory Data Analysis

    EDA involved exploring the sales data to answer key questions, such as:

    • What is the Average Cost?
    • What is the Average Revenue?
    • Determine the purchasing patterns of different demographic groups to identify areas to concentrate marketing efforts

    Data Analysis

    =AVERAGE()
    =MAX()
    =MIN()
    =SUM()
    =VLOOKUP()
    =XLOOKUP()
    =IF(ISNA(VLOOKUP()),"Unique","Duplicate")
    
    • Pivot Table to Select Data for Analysis
    • Addressing Anomalies in data
      • Use a Scatter Chart to Find Outliers Outliers
      =LARGE()
      =SMALL()
    

    Results and Findings

    The analysis results are summarised as follows:

    • Average Cost = £26,479
    • Average Revenue = £43,764
    • The youth age group is globally the poorest area of sales.
    • Female adults are buying the most product and should be targeted for marketing efforts.

    Recommendations

    Based on the analysis, we recommend the following actions: the company can develop business decisions in relation to:

    • Invest in marketing and promotions in youth age group globally.
    • Focus on promoting sales in Australia for the male youth and in France for adult males.
    • Implement a customer segmentation strategy to target Female adults effectively.
    • Implement strategies to develop business decisions for sales in the United Kingdom as it has only one successful market category, that is, Youth.

    References

    1. Microsoft 365 OneDrive
    2. Cisco Skills for All
    3. Her Data Project
    Visit original content creator repository https://github.com/TeniOT/Introduction-to-Excel-for-data-analysis-and-visualisation
  • react-router

    🚃 react router

    IMPORTANT: This project as been copied and continues on cher-ami/router repository


    React router API is inspired by wouter,
    solidify router and
    vue router API.

    Why another react router?

    Because manage routes transitions with React is always complicated, this router is build to allow transitions flexibility.
    It provides Stack component who render previous and current page component when route change.

    This router loads history, path-parser and debug as dependencies.

    API

    Components:

    Hooks:

    • useRouter Get router instance from any component
    • useLocation Get current location and set new location
    • useRoute Get previous and current route
    • useStack Register page component in stack
    • useRouteCounter Get route counter + isFirstRoute state
    • useHistory Handle history changed and get global router history

    Installation

    TODO

    Simple usage

    // create a route object
    const routesList = [
      { path: "/foo", component: FooPage },
      { path: "/bar", component: BarPage },
    ];
    
    // wrap render with <Router /> component
    function App() {
      return (
        <Router routes={routesList} base={"https://github.com/"}>
          <nav>
            <Link href={"/foo"} />
            <Link href={"/bar"} />
          </nav>
          <Stack manageTransitions={manageTransitions} />
        </Router>
      );
    }
    
    // manage transitions function is a Stack props
    const manageTransitions = ({ previousPage, currentPage }) =>
      new Promise(async (resolve) => {
        if (previousPage) await previousPage.playOut();
        if (currentPage) await currentPage.playIn();
        resolve();
      });

    Page component need to be wrap by React.forwardRef. The handleRef lets hold transitions, ref, etc. used by <Stack /> component.

    const FooPage = forwardRef((props, handleRef) => {
      const componentName = "FooPage";
      const rootRef = useRef(null);
    
      // create custom page transitions (example with GSAP)
      const playIn = () => {
        return new Promise((resolve) => {
          gsap.from(rootRef.current, { autoAlpha: 0, onComplete: resolve });
        });
      };
      const playOut = () => {
        return new Promise((resolve) => {
          gsap.to(rootRef.current, { autoAlpha: 0, onComplete: resolve });
        });
      };
    
      // register page transition properties used by Stack component
      useStack({ componentName, handleRef, rootRef, playIn, playOut });
    
      return (
        <div className={componentName} ref={rootRef}>
          {componentName}
        </div>
      );
    });

    Nested Router

    TODO

    Manage transition examples

    TODO

    • isReadyPromise example
    • crossed transition example

    Router

    Router component create a new router instance.

    <Router routes={} base={} id={}>
      {/* can now use <Link /> and <Stack /> component */}
    </Router>

    Props:

    • routes TRoute[] Routes list
    • base string Base URL – default: "https://github.com/"
    • id number | string (optional) Router instance ID – default: 1

    Link

    Trig new route.

    <Link to={} className={} />

    Props:

    • to string Path ex: “/foo”. Can Be absolute /path/foo or relative path/foo
    • className string (optional) Class name added to component root DOM element

    Stack

    Render previous and current page component.

    <Stack manageTransitions={} className={} />

    Props:

    • manageTransitions (T:TManageTransitions) => Promise<void>
      This function allow to create the transition scenario.
    • className string (optional) className added to component root DOM element

    type TManageTransitions = {
      previousPage: IRouteStack;
      currentPage: IRouteStack;
      unmountPreviousPage: () => void;
    };
    
    interface IRouteStack {
      componentName: string;
      playIn: () => Promise<any>;
      playOut: () => Promise<any>;
      isReady: boolean;
      $element: HTMLElement;
      isReadyPromise: () => Promise<void>;
    }

    useRouter

    Get current router instance.

    const router = useRouter();

    useLocation

    Allow the router to change location.

    const [location, setLocation] = useLocation();
    // give URL
    setLocation("/bar");
    // or an object
    setLocation({ name: "FooPage", param: { id: "2" } });

    Returns:

    An array with these properties:

    • location string Get current pathname location
    • setLocation (path:string | TOpenRouteParams) => void Open new route

    type TOpenRouteParams = {
      name: string;
      params?: { [x: string]: any };
    };

    useRoute

    Get previous and current route properties (TRoute)

    const { currentRoute, previousRoute } = useRoute();

    Returns:

    An object with these properties:

    • currentRoute (TRoute) Current route object
    • previousRoute (TRoute) Previous route object

    type TRoute = {
      path: string;
      component: React.ComponentType<any>;
      props?: { [x: string]: any };
      parser?: Path;
      children?: TRoute[];
      matchUrl?: string;
      fullUrl?: string;
    };

    useStack

    Prepare page component for Stack.

    useStack({ componentName, handleRef, rootRef, playIn, playOut, isReady });

    Parameters:

    • componentName string Name of current component
    • handleRef MutableRefObject<any> Ref handled by parent component
    • rootRef MutableRefObject<any> Ref on root component element
    • playIn () => Promise<any> (optional) Play in transition – default: new Promise.resolve()
    • playOut () => Promise<any> (optional) Play out transition – default: new Promise.resolve()
    • isReady boolean (optional) Is ready state – default: true

    Returns:

    nothing

    useRouteCounter

    Returns route counter

    const { routeCounter, isFirstRoute, resetCounter } = useRouteCounter();

    Parameters:

    nothing

    Returns:

    An object with these properties:

    • routerCounter number Current route number – default: 1
    • isFirstRoute boolean Check if is first route – default: true
    • resetCounter () => void Reset routerCounter & isFirstRoute states

    useHistory

    Allow to get the global router history and execute a callback each time history change.

    const history = useHistory((e) => {
      // do something
    });

    Parameters:

    • callback (event) => void Callback function to execute each time the history change

    Returns:

    • history location[] : Location array of history API

    Example

    Install dependencies

    $ npm i

    Start dev server

    $ npm run dev

    Credits

    Willy Brauner

    Visit original content creator repository
    https://github.com/willybrauner/react-router

  • subsafe-commander

    SubSafe Commander for Safe Transaction Batching

    Control your Fleet of safes from the command line! Claim your $SAFE token airdrop in style.

    TLDR;

    To Claim $SAFE Airdrop on behalf of a family of sub-safes (with signing threshold 1) all of which
    are owned by a single “parent” safe, do this:

    Create an .env file with the following values:

    NODE_URL=
    PARENT_SAFE=
    # Private key of Parent Owner
    PROPOSER_PK=
    DUNE_API_KEY=

    Run the following (full-claim script)

    docker run --pull=always -it --rm \
      --env-file .env \
      ghcr.io/bh2smith/subsafe-commander:main \
      --command CLAIM \
      --parent $PARENT_SAFE

    If you don’t have a DUNE_API_KEY, you can also provide an additional argument --sub-safes with a
    comma separated list of safes owned by $PARENT_SAFE.

    Find your Sub-Safes

    For example, the following dune query shows “fleets” of Safes owned by a single parent
    (this is not a comprehensive list)

    For all fleets on all networks check
    here: https://dune.com/queries/1436503

    General Usage

    With environment variables

    # General defaults
    NODE_URL=https://rpc.ankr.com/eth
    INDEX_FROM=0
    NUM_SAFES=90 <-- This is the CAP.
    # Must be provided
    PARENT_SAFE=
    # Private key of Parent Owner
    PROPOSER_PK=
    DUNE_API_KEY=

    this project exposes the following contract method calls:

    docker run --pull=always -it --rm \
      --env-file .env \
      ghcr.io/bh2smith/subsafe-commander:main \
      --command $COMMAND \
      --parent $PARENT_SAFE \
      --index-from $INDEX_FROM \ 
      --num-safes $NUM_SAFES \
      [--sub-safes SUB_SAFES]

    with currently supported commands

    --command {CLAIM,ADD_OWNER,setDelegate,clearDelegate}

    Note that --sub-safes is optional. If not provided then a DUNE_API_KEY will be expected (to
    fetch them).

    Safe: Add Owner

    Requires additional arguments --new-owner NEW_OWNER

    Airdrop

    Individual commands are supported as well as “Full Claim” (–command FullClaim)
    which combines delegate, redeem and claim into a single transaction.
    Note: that this is not recommended for more than 26 SubSafes at a time

    Redeem

    Requires no additional arguments. Note that no token transfers are expected to occur during
    redemption, these happen on claim (and claim comes after redeem).

    Claim

    Requires no additional arguments. It sets the beneficiary of the SAFE tokens to $PARENT_SAFE.

    Examples

    For more examples, see some gas
    benchmarking here

    Full Claim

    This project also supports a full claim cycle, which is the combination of (delegate, redeem and
    claim). However, due to gas limitations this is restricted to a maximum of 30 safes.

    Snapshot

    setDelegate

    Requires no additional arguments. It sets the delegate of “safe.eth” namespace to $PARENT_SAFE.

    clearDelegate

    Requires no additional arguments.

    Installation & Local Development

    python3 -m .venv .venv
    source ./.venv/bin/activate
    pip install -r requirements.txt
    cp .env.sample .env    <----- Copy your Dune credentials here!

    Run Tests

    python -m pytest tests

    Docker

    Build Locally & Run

    git clone git@github.com:bh2smith/subsafe-commander.git
    cd subsafe-commander
    docker build . -t subsafe-commander
    docker run -it --rm --env-file .env --command $COMMAND --parent $PARENT_SAFE --index-from $INDEX_FROM --num-safes $NUM_SAFES

    Pull From Anywhere & Run

    docker run --pull=always -it --rm \
      --env-file .env \
      ghcr.io/bh2smith/subsafe-commander:main \
      --command $COMMAND \
      --parent $PARENT_SAFE \
      --index-from $INDEX_FROM \
      --num-safes $NUM_SAFES

    Note, this commands expects you to have a .env file in your present working directory!

    Visit original content creator repository
    https://github.com/bh2smith/subsafe-commander

  • Android-skin-support

    Visit original content creator repository
    https://github.com/supengchao/Android-skin-support

  • Shortly

    Shortly

    Netlify Status

    Shortly is a friendly web app, which uses URL shorteners to simplify the sharing of links.

    Site

    Project description: single-page application that consumes data from at least one API and persists user data via Firebase

    Technical Requirements

    The requirements of this project are:

    ✔ A SPA (single page application) that consumes data from at least one API
    ✔ Make at least one HTTP request to a third-party server
    ✔ Use either vanilla JS or jQuery to perform DOM manipulation
    ✔ Listen for events and add interactivity based on user input
    ✔ Clean And Readable Code. The instructor should be able to read and follow your code easily.
    ✔ Maintain clean and readable code including: consistent indentation, code commenting and use of proper and consistent naming conventions.
    ✔ Object Oriented and/or Functional. Implement function closures, keep code modular, maintain a separation of concerns, only put code on the global scope when absolutely necessary.

    About

    The original idea was downloaded on frontendmentor website as a design guide.
    Shortly was created using vanilla JavaScript.
    The “Shorten it” click transforms a long URL into a short one by using Bitly or Rebrandly tools, radically.
    When clicking on the SignUp button, it calls Authorization Firebase API with the Google option. The return is a valid user, which name is printed on the page. This function could be used to save a short URL on the database.

    New knowledge

    Netlify functions for getting environment variables
    https://docs.netlify.com/functions/overview/#manage-your-serverless-functions

    References

    Frontend Mentor: https://www.frontendmentor.io
    Firebase: https://firebase.google.com/docs/auth/web/google-signin?authuser=0
    Bitly: https://bit.ly
    Rebrandly: https://rebrandly.com/
    Netlify: https://netlify.com
    Alex’s website: https://alexandrebelloni.com

    Visit original content creator repository https://github.com/alexbelloni/shortly