Biblioteca App é um pequeno sistema que simula um gerenciamento de uma biblioteca, como o cadastro de livros, reservas e devoluções. Possui autenticação síncrona com o banco de dados, ou seja, é necessário que o usuário esteja previamente cadastrado no banco de dados para conseguir visualizar a página inicial da Biblioteca App.
Funcionalidades do sistema
Cadastrar livros, reservas e usuários
Editar livros, reservas e usuários
Remover livros, reservas e usuários
Devolver livros
Recursos utilizados
IDE IntelliJ IDEA 2022.2 (Community Edition)
Linguagem Java
Framework Spring
Banco de dados MySQL
Postman v10.13.5
Endpoints
O sistema possui uma única tela (página inicial), sendo apenas possível cadastrar livros, reservar ou devolver. Caso queira executar alguma outra ação listada nas funcionalidades do sistema, como cadastrar livros por exemplo, é possível utilizando a API Postman. No arquivo localizado em src/main/resources/templates/Biblioteca App.postman_collection.json, é possível visualizar todos os endpoints disponíveis no sistema. O arquivo também pode ser importado no Postman.
Autenticação
Como já informado no início, o sistema requer autenticação e há dois possíveis métodos de autenticação no sistema:
utilizando a autenticação Basic Auth, que requer um usuário e senha cadastrados previamente no banco de dados,
utilizando a autenticação por JWT, o Bearer Token, que também requer um usuário e senha cadastrados previamente no banco de dados, porém existe um tempo de validade para a autenticação.
Basic Auth
Criar um usuario para autenticação. Abaixo segue o SQL para criar o usuário adm com a senha adm na tabela usuario:
O token tem validade de 8 horas e esse período pode ser alterado modificando a propriedade security.jwt.expiration no arquivo application.properties. O valor numeral deve ser informado em minutos. Para usar o token com o Postman, adicionar na configuração “Headers” do endpoint desejado:
Também é possível remover essas duas configurações de autenticação, e incluir um outro método mais simples no sistema que não requer validação com o banco de dados, basta adicionar a dependência do próprio spring. Esta autenticação consiste em um usuário padrão e uma senha pré-definida e já possui interface própria do spring. Para utilizar essa autenticação, basta incluir a seguinte dependência no arquivo pom.xml:
O usuário padrão é user e a senha aparece no console da IDE desta forma: Using generated security password: cd2ed133-f34e-4951-85e3-9fccaa8a3e915
Executar Biblioteca App usando arquivo jar
Para executar o sistema na sua máquina, seguir os seguintes passos:
Fazer o download deste projeto em algum diretório local,
Abrir algum terminal de comando da sua máquina (Prompt de Comando, Windows PowerShell),
Executar o comando mvn clean package,
Executar o comando cd target,
Executar o comando java -jar bibliotecaApp-0.0.1-SNAPSHOT.jar,
Aguardar pela mensagem Started BibliotecaAppApplication in n seconds,
Acessar o endereço http://localhost:8080. Enquanto o terminal de comando estiver aberto, a aplicação ficará em execução, caso contrário, a aplicação será encerrada.
Store information for connecting to ReportPortal web service (Run with Docker in this case).
Deploy ReportPortal With Docker
Install Docker, Docker Machine
Bash completion is a bash function that allows you to auto complete commands or arguments by typing partially commands or arguments, then pressing the [Tab] key. This will help you when writing the bash command in terminal. $ brew install bash-completion
Docker for Mac is best installed with Homebrew and Homebrew Cask. For other ways to install on MacOS, see Install Docker for Mac in Docker’s docs. $ brew cask install docker
Download the Docker Machine binary and extract it to your PATH. $ base=https://github.com/docker/machine/releases/download/v0.16.0 && curl -L $base/docker-machine-$(uname -s)-$(uname -m) >/usr/local/bin/docker-machine && chmod +x /usr/local/bin/docker-machine
To check the version type the following command.
Mac:~ ngoanh2n$ docker --version
Docker version 19.03.5, build 633a0ea
Mac:~ ngoanh2n$ docker-compose --version
docker-compose version 1.25.2, build 698e2846
Mac:~ ngoanh2n$ docker-machine --version
docker-machine version 0.16.0, build 702c267f
Start Docker desktop community. $ open /Applications/Docker.app
Deploy ReportPortal
By the following official instructions here, you can do that in shortly.
Navigate repository root. $ cd selenide-testng-reportportal-example
Download the latest compose descriptor. $ curl https://raw.githubusercontent.com/reportportal/reportportal/master/docker-compose.yml -o docker-compose.yml
Start the application using the following command. $ docker-compose -p reportportal up -d --force-recreate
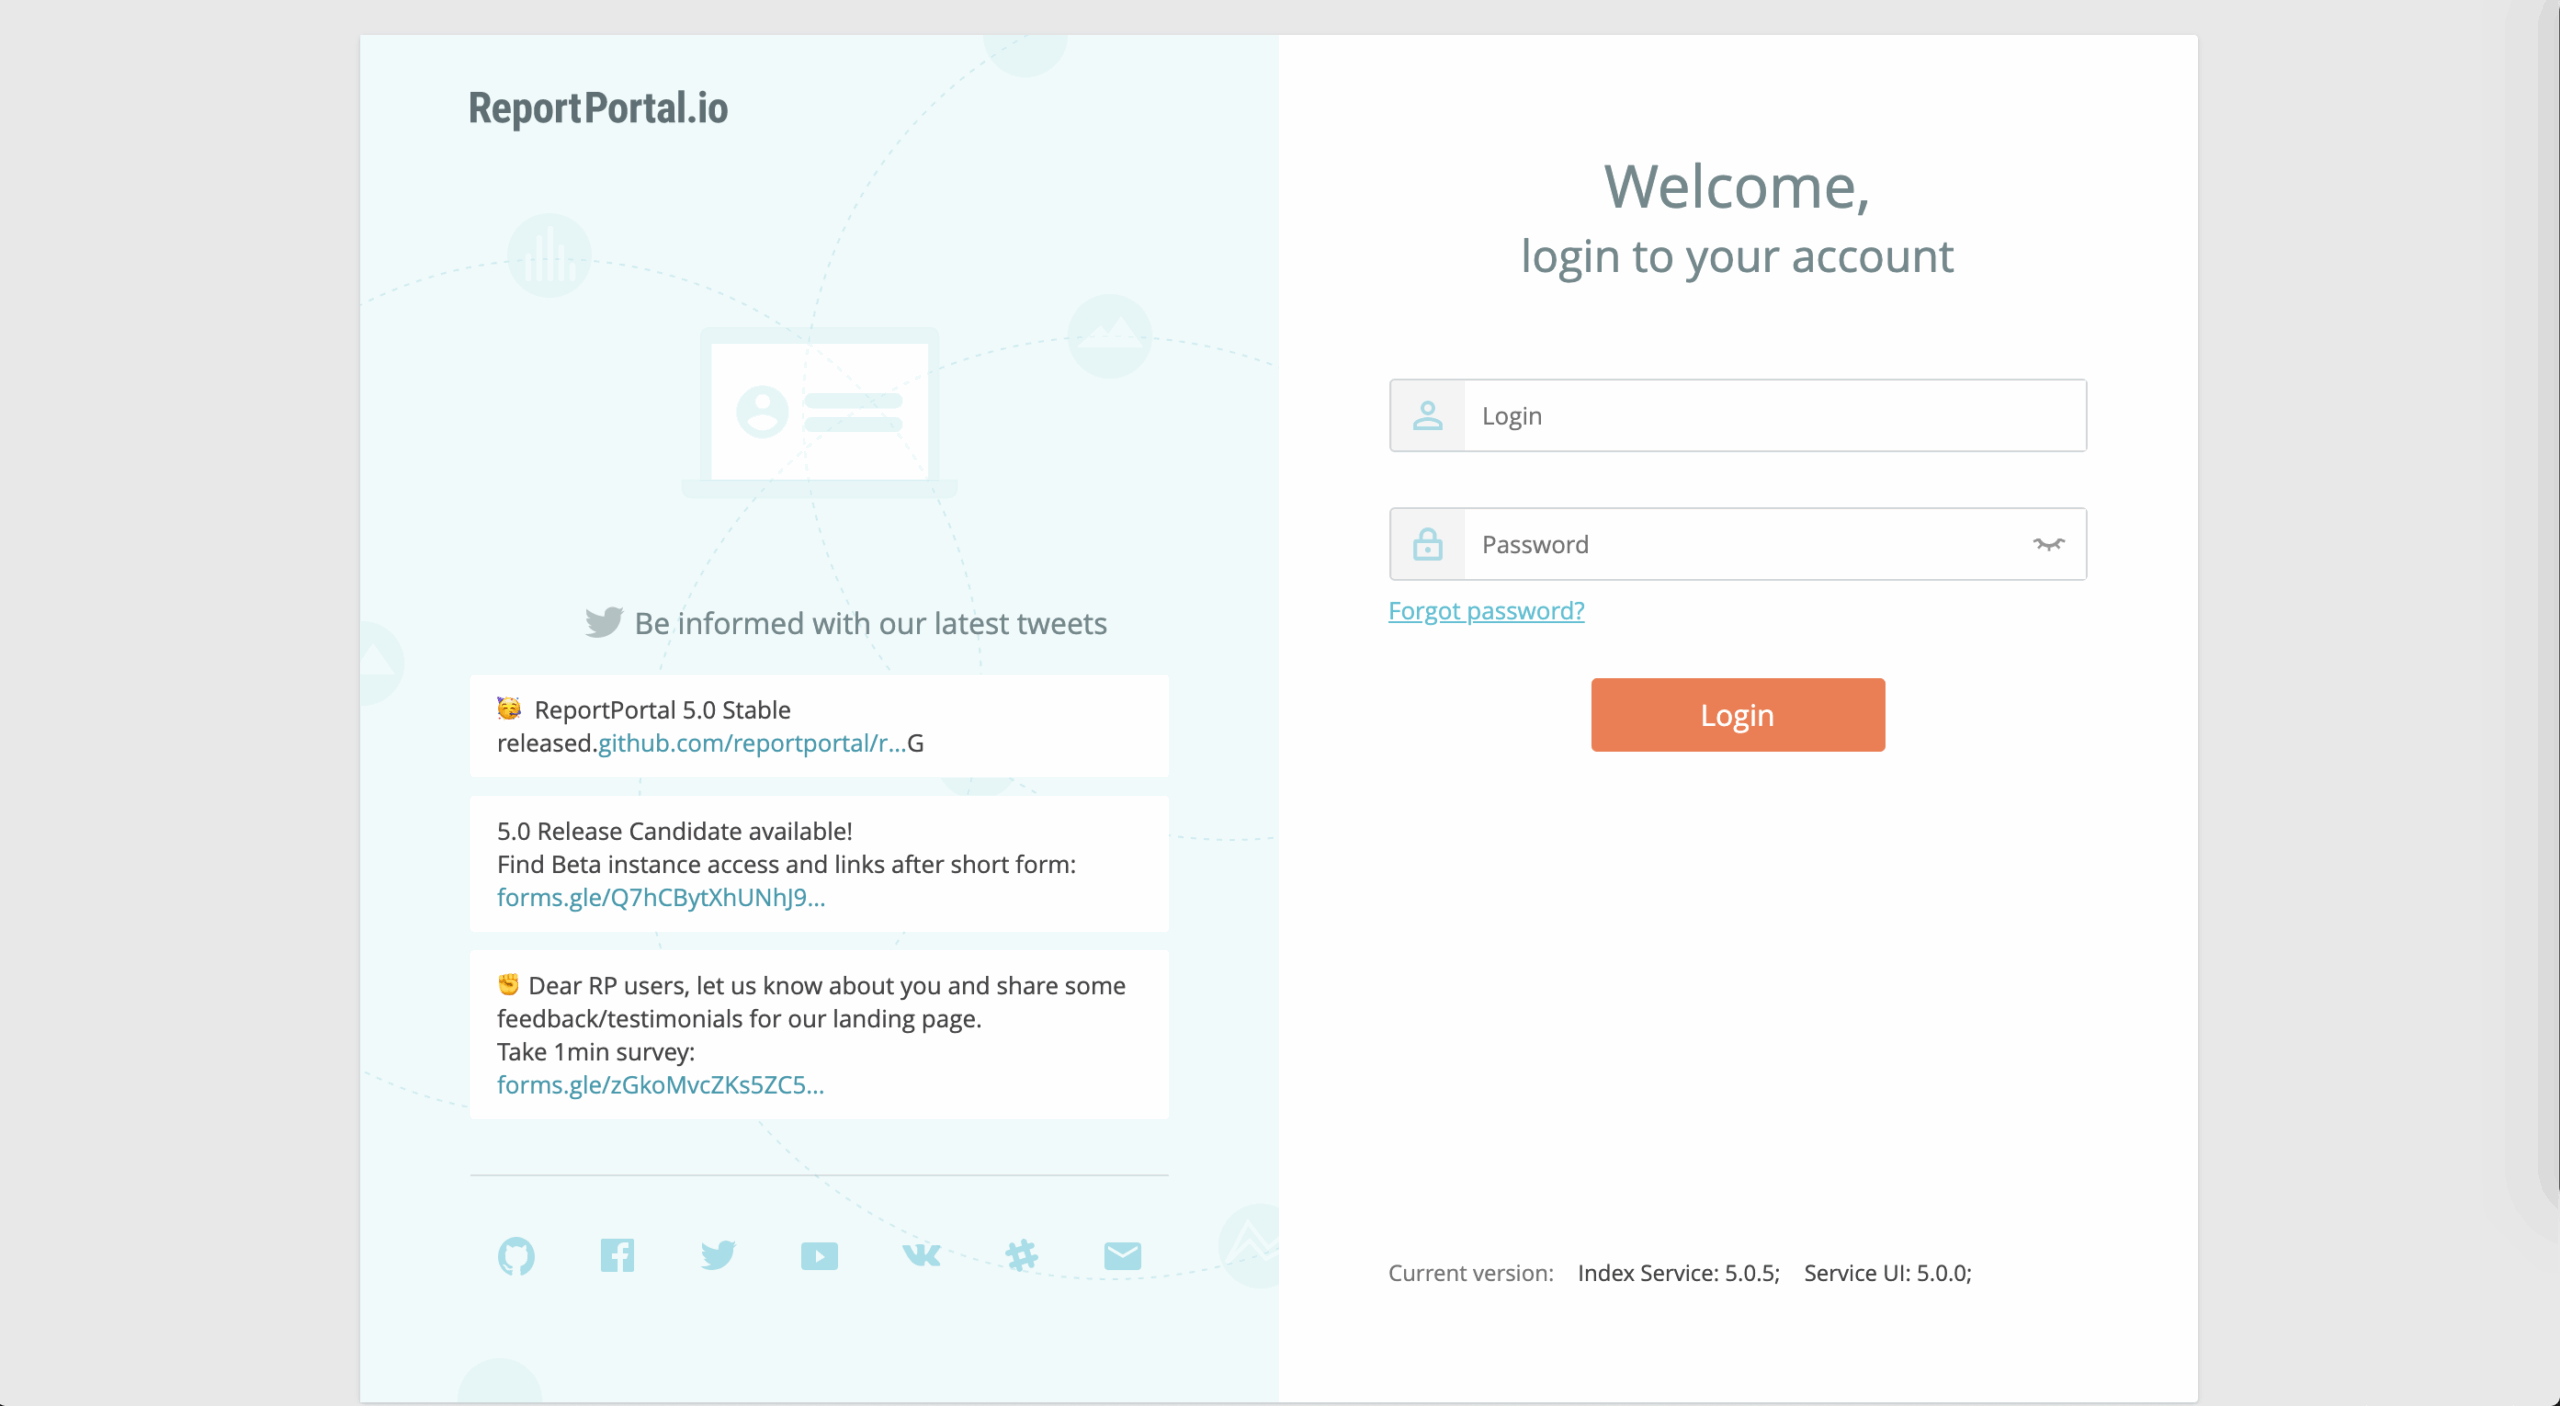
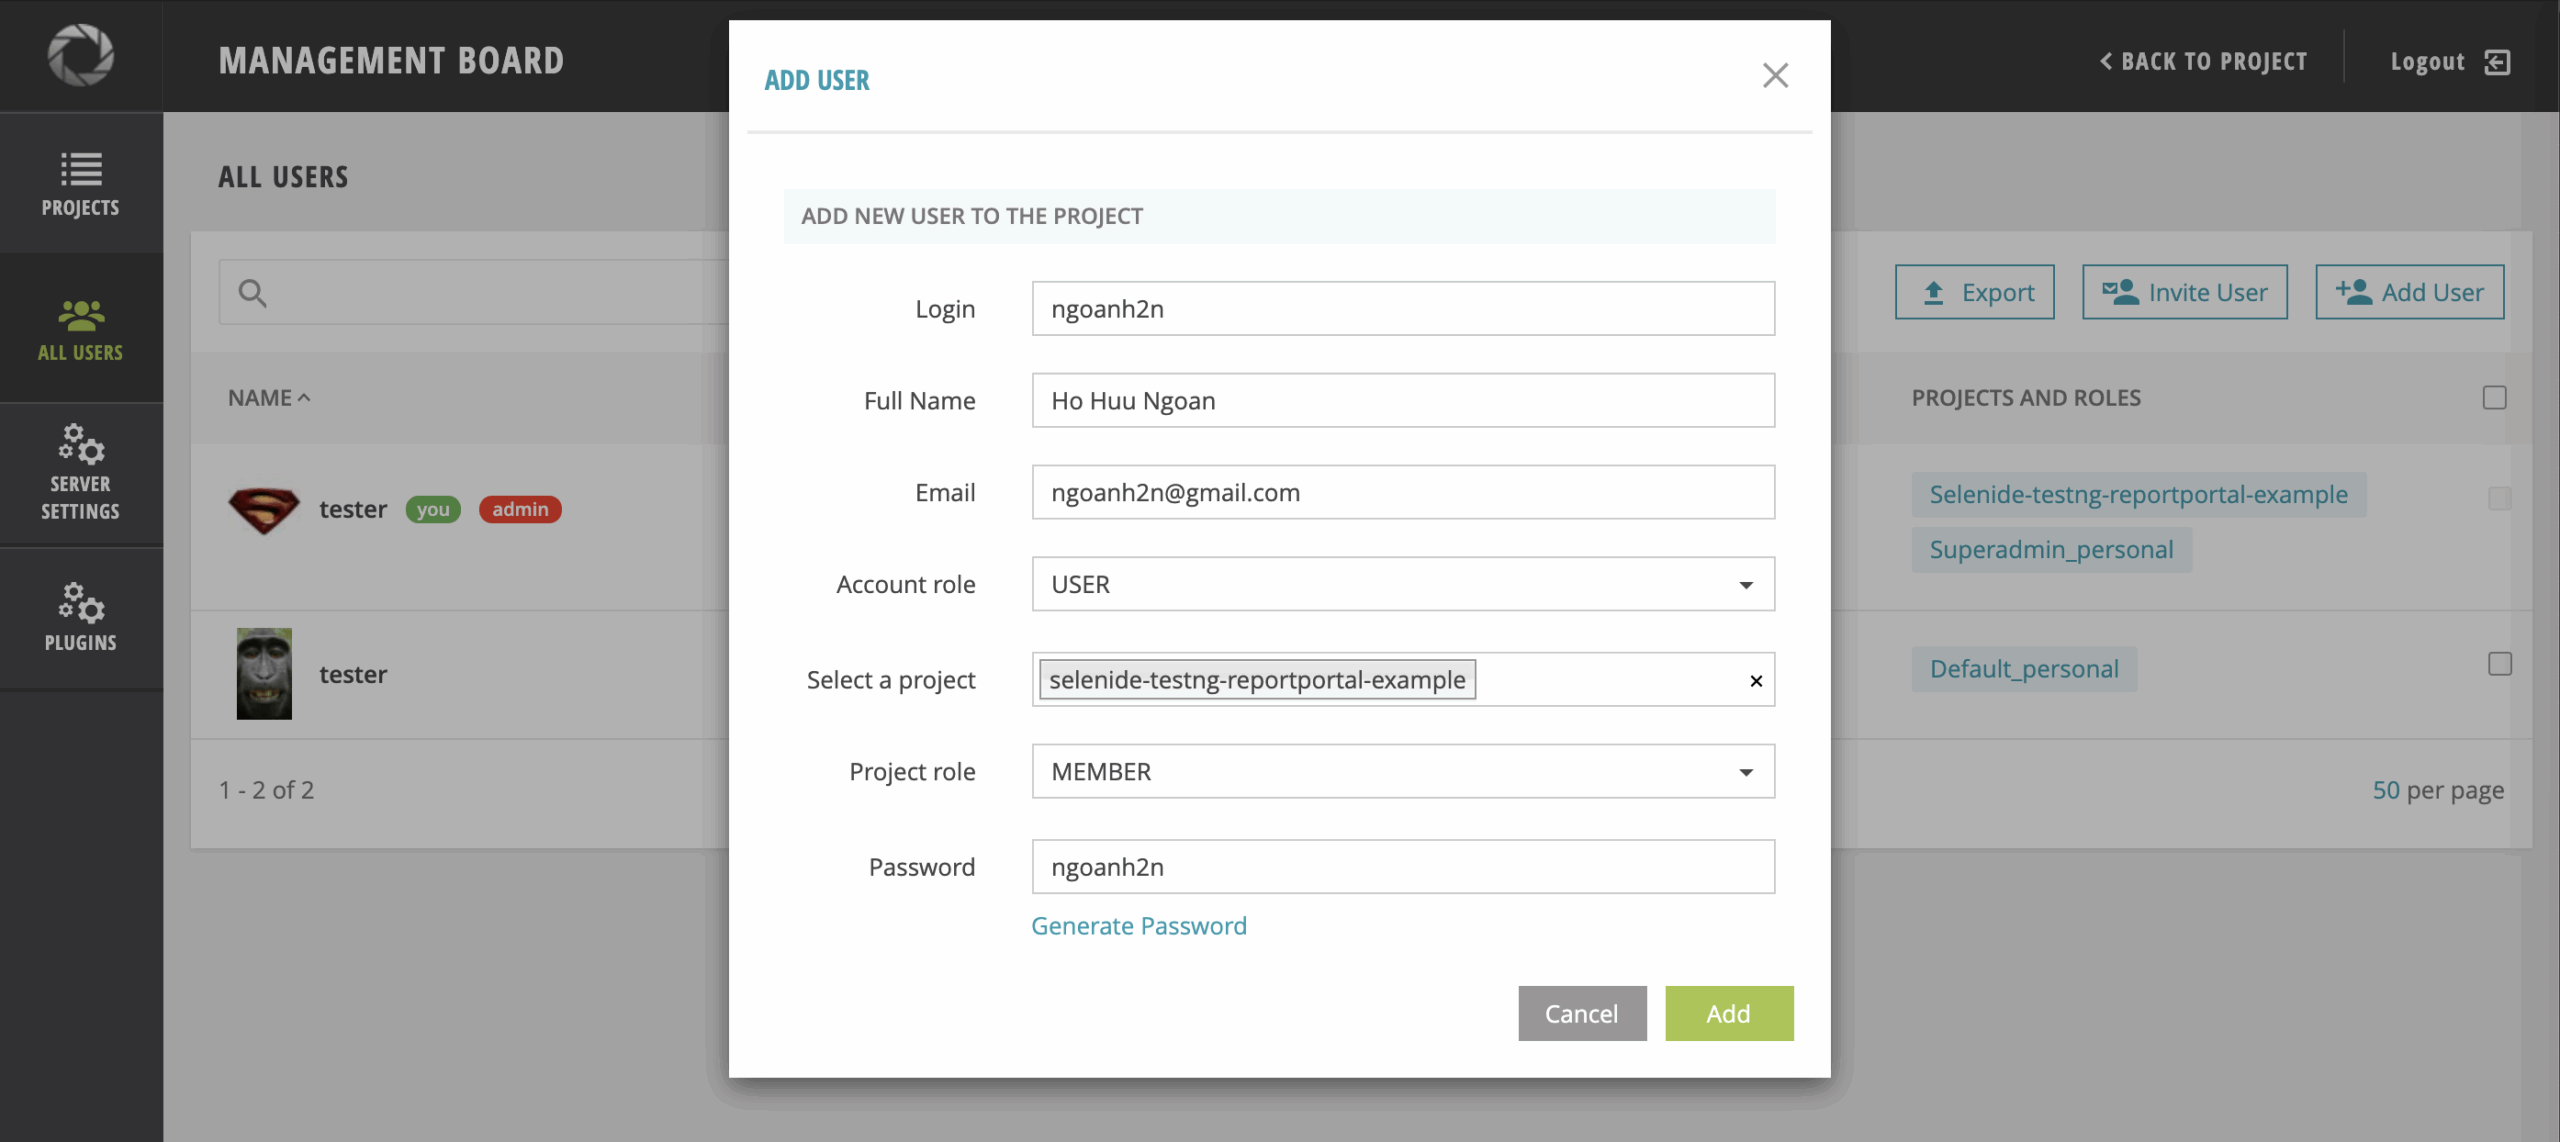
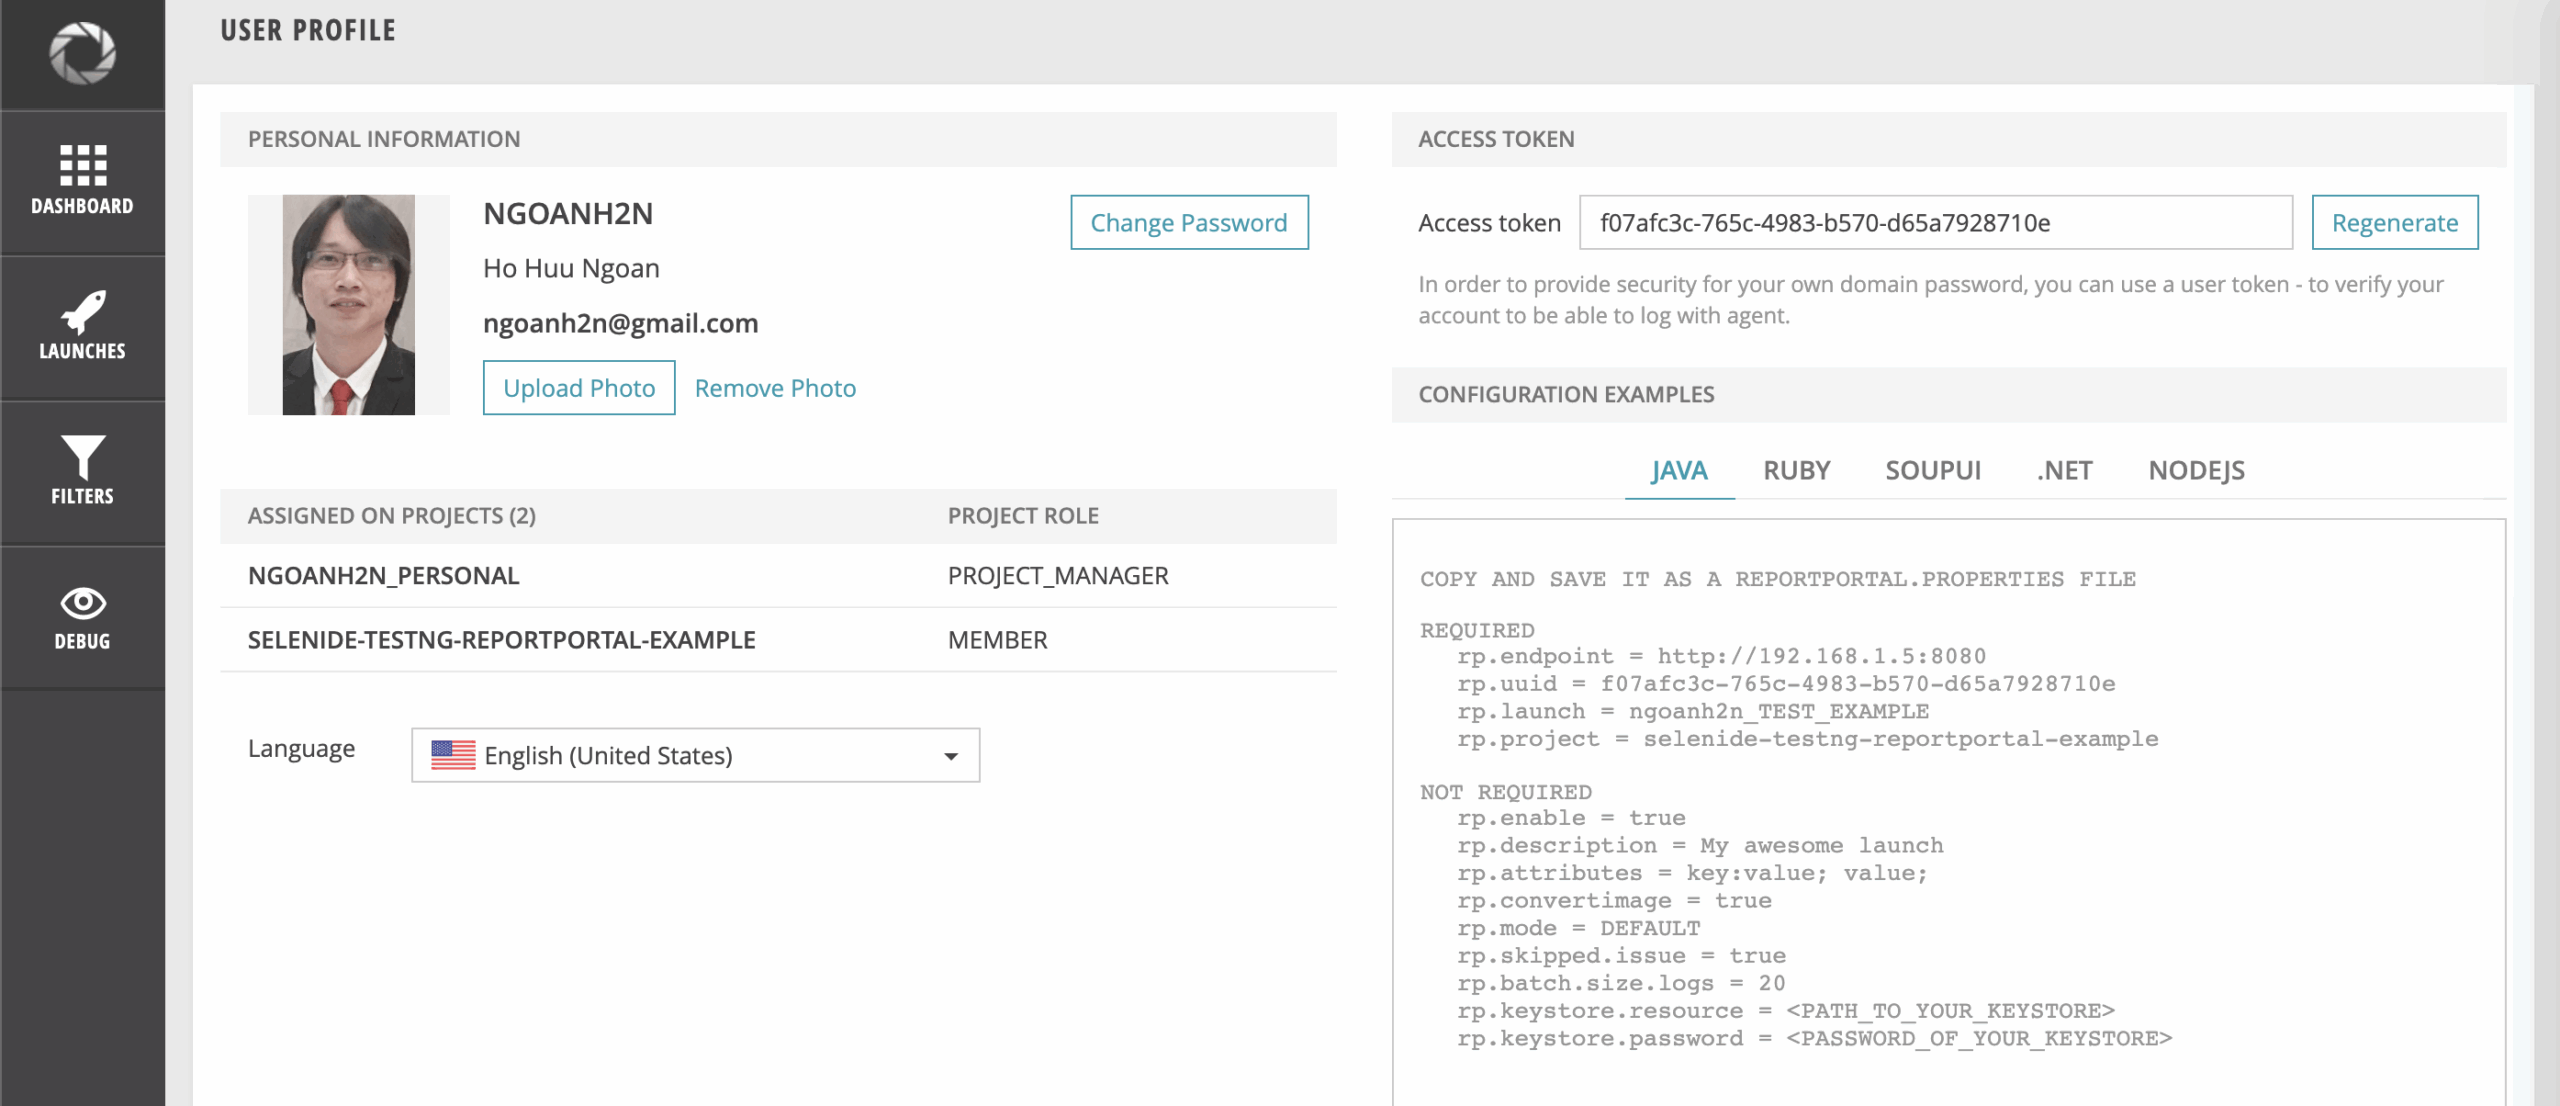
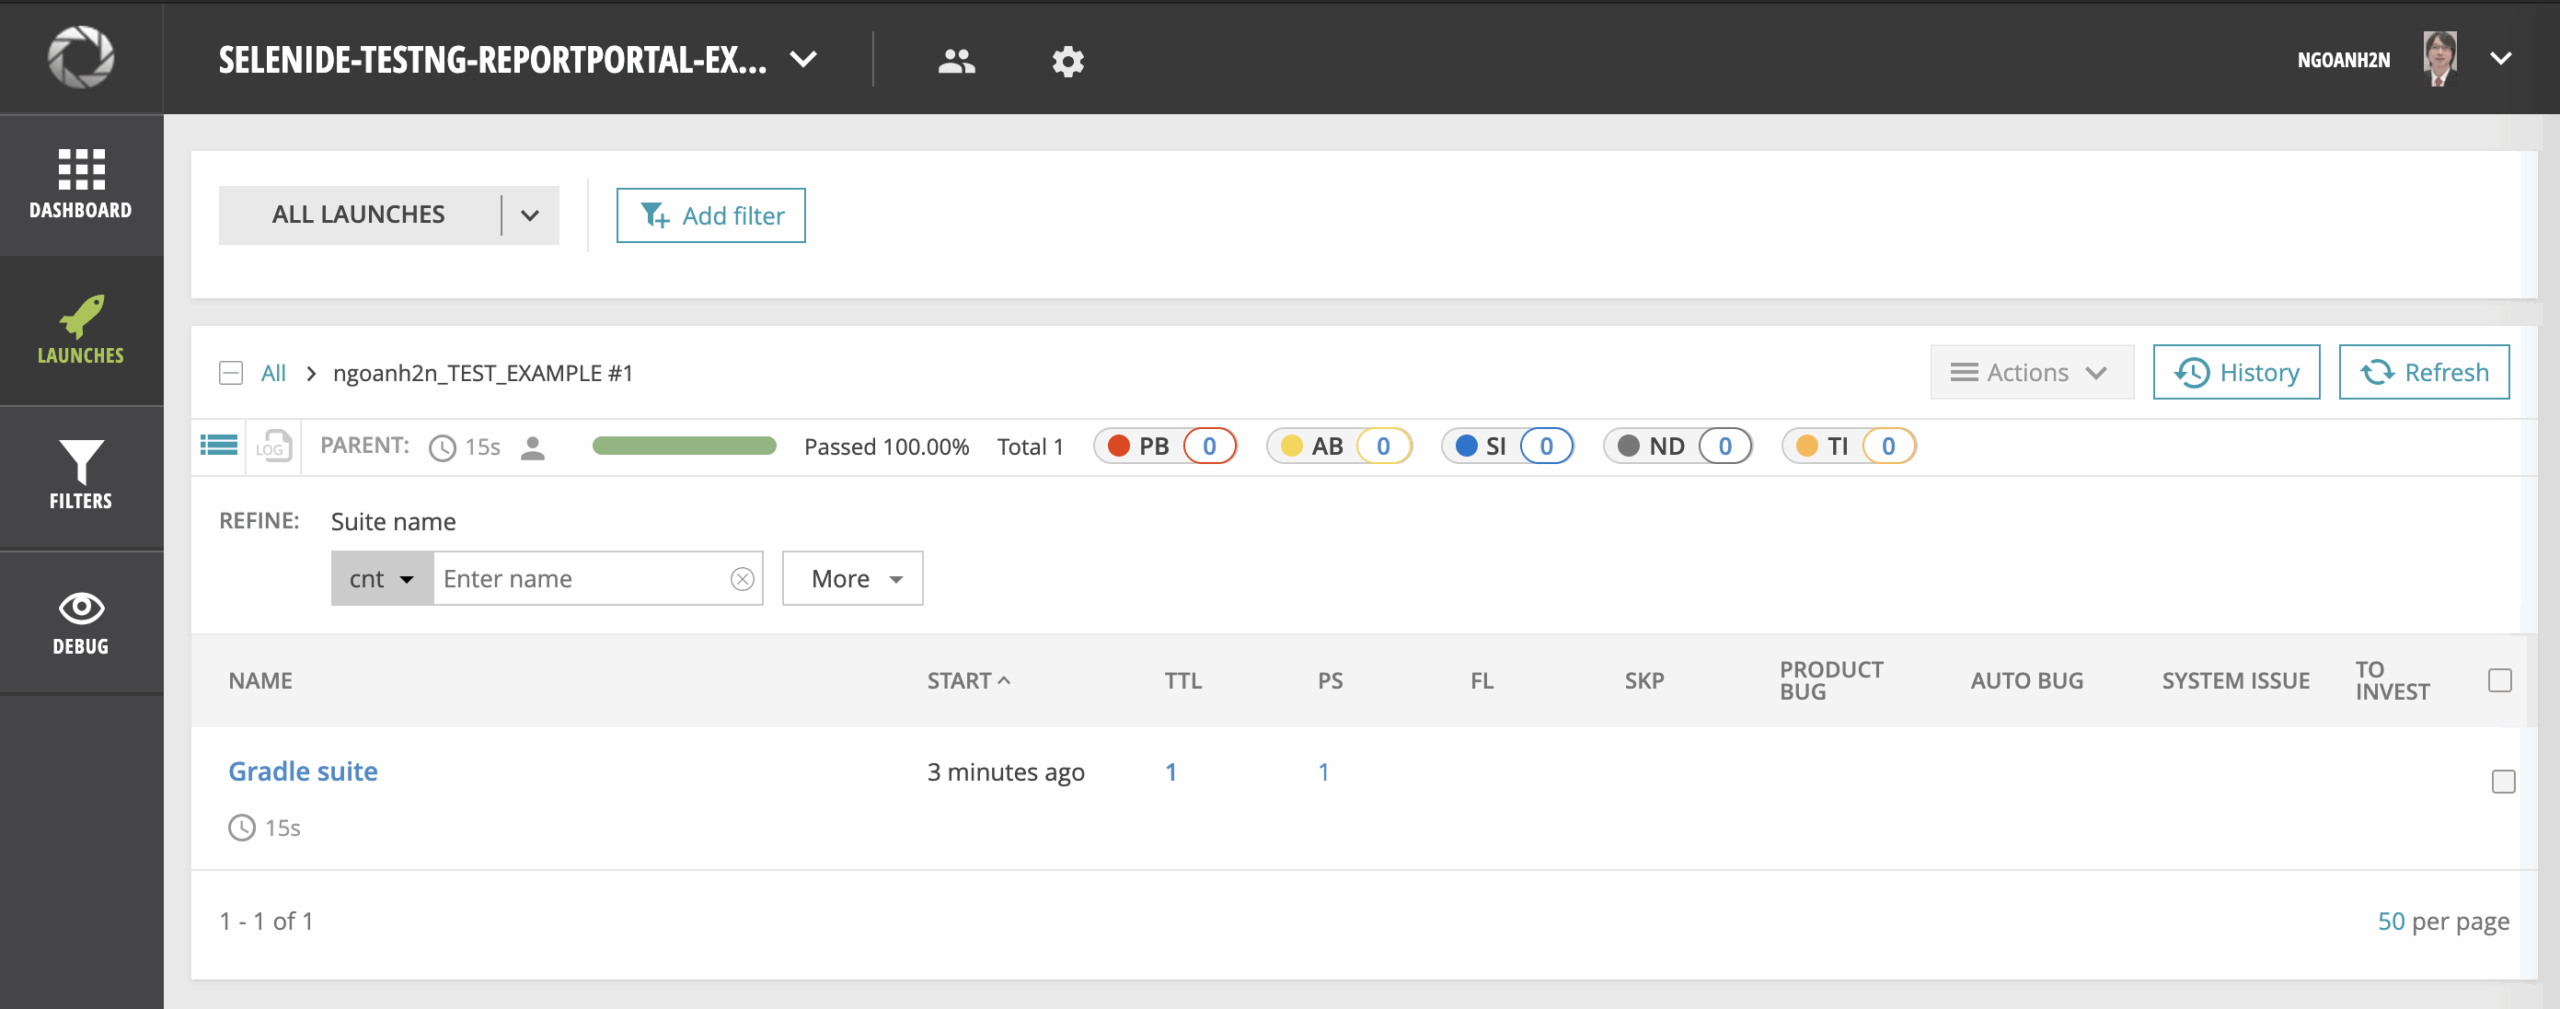
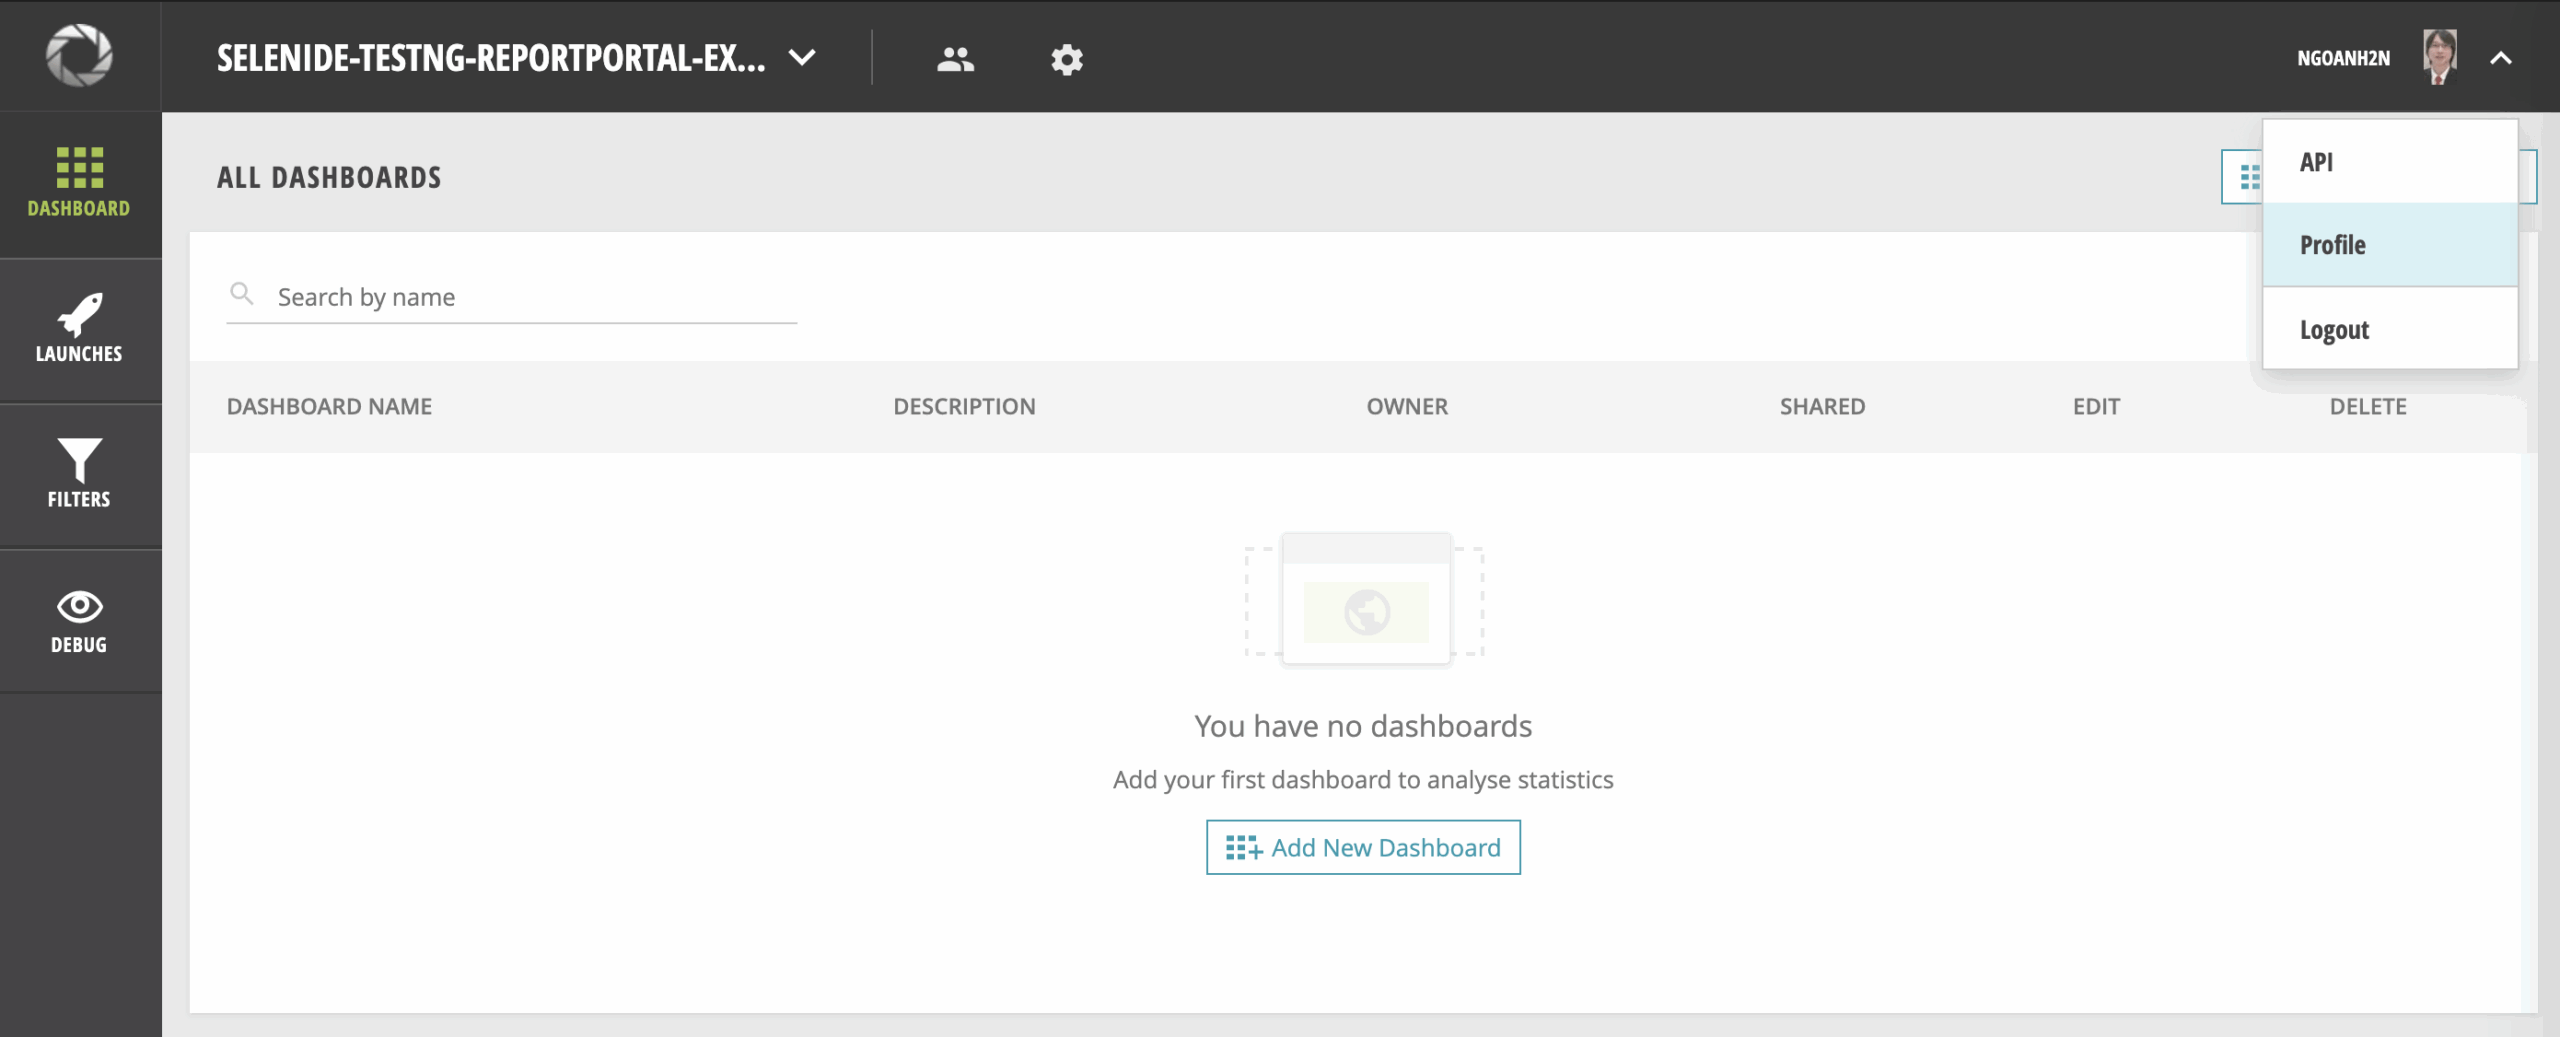
Setup ReportPortal UI
Get current IP on your mac machine (For ethernet in this case).
Store information for connecting to ReportPortal web service (Run with Docker in this case).
Deploy ReportPortal With Docker
Install Docker, Docker Machine
Bash completion is a bash function that allows you to auto complete commands or arguments by typing partially commands or arguments, then pressing the [Tab] key. This will help you when writing the bash command in terminal. $ brew install bash-completion
Docker for Mac is best installed with Homebrew and Homebrew Cask. For other ways to install on MacOS, see Install Docker for Mac in Docker’s docs. $ brew cask install docker
Download the Docker Machine binary and extract it to your PATH. $ base=https://github.com/docker/machine/releases/download/v0.16.0 && curl -L $base/docker-machine-$(uname -s)-$(uname -m) >/usr/local/bin/docker-machine && chmod +x /usr/local/bin/docker-machine
To check the version type the following command.
Mac:~ ngoanh2n$ docker --version
Docker version 19.03.5, build 633a0ea
Mac:~ ngoanh2n$ docker-compose --version
docker-compose version 1.25.2, build 698e2846
Mac:~ ngoanh2n$ docker-machine --version
docker-machine version 0.16.0, build 702c267f
Start Docker desktop community. $ open /Applications/Docker.app
Deploy ReportPortal
By the following official instructions here, you can do that in shortly.
Navigate repository root. $ cd selenide-testng-reportportal-example
Download the latest compose descriptor. $ curl https://raw.githubusercontent.com/reportportal/reportportal/master/docker-compose.yml -o docker-compose.yml
Start the application using the following command. $ docker-compose -p reportportal up -d --force-recreate
Setup ReportPortal UI
Get current IP on your mac machine (For ethernet in this case).
b5st is a simple, Gutenberg-compatible WordPress starter theme loaded with Bootstrap 5 and Bootstrap Icons — using node-sass for preprocessing its SCSS into CSS.
Bootstrap customized comments and feedback response form.
Gutenberg Compatibility
Gutenberg editor stylesheet – into which has been copy-pasted the typography styles from Bootstrap 5’s Reboot CSS plus a few extras.
b5st has a centered narrow single-column layout, so that it can make use of Gutenberg’s extra-wide and full width blocks. In the front-end CSS, these are handled by a variation on Andy Bell’s full bleed utility.
Child-Themes and b5st
I recommend you do not simply use b5st as-is, and then do all your designing in a child theme.
b5st is only a meant to be a place to start a WordPress/Bootstrap 5 project. It is easier and better to directly rebuild b5st to suit your design needs. Besides, future improvements to b5st may make it not compatible with your child theme — so, you may not be able to “upgrade” your project to a newer version of b5st simply by swapping it out.
With that said, you can develop child themes based off your (b5st-based) project. After you have taken and made b5st your own, modifying its layouts, styles etc. to create your own theme, and then deployed it on a live website, then you can later make child themes from what will then be your (client’s) website theme. For example, for special occasions you can make a child themes with alternate colors and backgrounds, seasonal layout changes, etc.
To aid you at that point, b5st has the following child-theme friendly features:
Many functions are pluggable.
Theme hooks – paired before and after the navbar, post/page main, (optional sidebar) and footer. Parent theme hooks are able to recieve actions from a child theme.
Also, the navbar brand, navbar search form and sub-footer “bottomline” are inserted using pluggable hooks. So, a child theme can override these.
Preprocessing SCSS Files
In the theme/ folder there is a scss/ folder containing all the SCSS files that have been used to create the file theme/css/b5st.css.
You can (beautify and) edit b5st.css directly — or you can preprocess the SCSS files using whatever you prefer to use. A simple way is to do the following:
Install b5st (this theme) into your WordPress (local) development environment.
Download and install NodeJS, if you don’t have it already.
In your terminal, cd into the b5st folder. Just do npm install so that node-sass gets installed as a dev dependancy (see the b5st package.json).
You can then run node-sass in the terminal using npm run scss, and stop it using ctrl+C. node-sass will look for changes in SCSS files inside the b5st/theme/scss folder and output the CSS file(s) in the b5st/theme/css folder.
Initially, only b5st/theme/css/b5st.css is enqueued in functions/enqueues.php (after the Bootstrap 5 enqueue). You can add more enqueues the same way.
Your WordPress (local) development server likely has no live-refresh for when CSS files are modified in this way. So, manually do a browser refresh ↻ whenever you want to see your CSS changes.
Debido a que este manual ejecuta funciones avanzadas de JavaScript, requiere ser interpretado en un servidor web HTTP,
como Apache, IIS o Ngnix.
Sistema de Plantilla
Este manual usa un sistema de plantillas propio. En vez de tener que repetir todas las etiquetas HTML en cada página,
usa un código HTML mínimo para crear los artículos y el motor en JavaScript de la plantilla se encarga de crear el
resto del documento. El menú y el paginado se crean de forma automática configurando un archivo.
Note
Creé este sistema, porque a medida que el manual iba teniéndo más páginas se volvía un engorro tanto el modificar código
que afectaba a muchas páginas, como el reestructurar el orden de las páginas (cuando tienes que cambiar la URL
de un enlace en más de 100 páginas HTML, echas de menos los sistemas de plantillas propios de los backends).
Estructura de las páginas
Existen dos tipos de páginas, las individuales y las que tienen sub-páginas.
Para crear una nueva página, hay que crear una nueva carpeta en la carpeta “pages”, situada en la raíz del proyecto.
Crear una página individual
Si la página nueva, es una página individual, dentro de la carpeta creada deben de añadirse dos documentos:
index.html – Contendrá el HTML de la página.
page.css – Contendrá el CSS específico de esa página. (en muchas páginas está en blanco)
El archivo index.html tendrá el siguiente esquema:
<!DOCTYPE html><metacharset="UTF-8" xmlns="http://www.w3.org/1999/html"><scriptsrc="../../js/init.js"></script><pagedata-dir="../.." data-chapter="3">
HTML propio de ese artículo.
</page>
El código HTML de la página va dentro de la etiqueta page. Esta etiqueta tiene dos atributos: data-dir
y data-chapter.
data-dir : Indica la ruta a la raíz del proyecto, se usa para cargar correctamente los archivos. En las páginas
individuales su valor es: “../..”
data-chapter : Es un ID que indica con que entrada del archivo chapters.json(ver más adelante) se
corresponde ésta página.
A continuación hay que añadir la entrada de la página al archivo de configuración de capítulos: chapters.json en
./js/db/chapters.json:
El ID de cada entrada es un número “0”, “1”, “2”… que van ordenados de forma auto-incremental y comenzando siempre en
cero. El cero es la portada y no será visible en el menú ni en el paginado. El orden del resto de entradas será con el
que aparezcan en el menú y en el paginado. Así, en el ejemplo de arriba, la entrada con el ID 2, Tiro Base, sería el
segundo enlace en el menú.
La entrada tiene dos atributos: title y url.
title : Es el título de la página, se usa tanto en el menú, como en el encabezado de la página, como en la
etiqueta <title>
url : Es la URL de donde va a cargar los archivos. Se compone de la concatenación de /pages/ más el nombre de
la nueva carpeta que se ha creado.
Crear una página con sub-páginas
Si la página nueva, es una página con sub-páginas, dentro de la carpeta creada deben de añadirse, a su vez, una
sub-carpeta por cada sub-página. Y dentro de cada sub-carpeta, deben de añadirse dos documentos:
index.html – Contendrá el HTML de la página.
page.css – Contendrá el CSS específico de esa página. (en muchas páginas está en blanco)
El archivo index.html tendrá el siguiente esquema:
<!DOCTYPE html><metacharset="UTF-8" xmlns="http://www.w3.org/1999/html"><scriptsrc="../../../js/init.js"></script><pagedata-dir="../../.." data-chapter="7" data-section="1">
HTML propio de ese artículo.
</page>
El código HTML de la página va dentro de la etiqueta page. Esta etiqueta tiene tres atributos: data-dir,
data-chapter y data-section.
data-dir : Indica la ruta a la raíz del proyecto, se usa para cargar correctamente los archivos. En las páginas
con sub-páginas su valor es: “../../..”
data-chapter : Es un ID que indica con que entrada del archivo chapters.json(ver más adelante) se
corresponde ésta página.
data-section : Es un ID que indica con que sección de la entrada se corresponde ésta página (ver más adelante).
A continuación hay que añadir la entrada de la página al archivo de configuración de capítulos: chapters.json en
./js/db/chapters.json:
En el código de ejemplo anterior, la entrada del archivo con el ID 6 es una página individual, y la entrada con el ID 7
es una página con sub-páginas.
Las entradas con sub-páginas tiene dos atributos: title y sections.
title : Es el título de la página, se usa en el menú.
sections : Son las entradas de las sub-páginas. Sus IDs son auto-incrementales y comienzan en 1. A su vez,
tienen dos atributos: title y url, funcionan como las páginas individuales.
Uso real de JQuery
Note
Aunque el proyecto usa la biblioteca JQuery, la mayoría del código es JavaScript vanilla, simplemente he usado JQuery
por la sintaxis de selectores del DOM abreviada y por el bindeo de eventos con propagación, que funcionan muy bien,
me parecen las funcionalidades mejor optimizadas de JQuery. No soy muy fan del resto de funcionalidades de JQuery y creo
que las soluciones en vainilla JS no sólo obtienen mejor performance, sino que aportan una metodología más ordenada.
Por eso no he creado los componentes usando el sistema de componentes de JQuery, no me aportaban nada.
Por qué no BEM
Tip
BEM sigue siendo un estándar importante para coordinar proyectos grandes donde múltiples personas trabajarán con los
archivos CSS. Sin embargo, desde que CSS incorporó el nesting de forma nativa en 2021, se han facilitado métodos
alternativos para mantener un código CSS limpio y organizado.
Además, creo que existe un mito exagerado, mal entendido, con la especificidad de los selectores CSS, y que la
propagación de BEM y las enseñanzas de ciertos “gurús” contribuyeron a ello.
La especificidad es una característica buscada por el W3C y es
MUY UTIL. Una cosa es tener un lío impresionante con la jerarquía de los selectores y otra es que no aproveches una
característica perfectamente válida de las hojas de estilos.
Por todo ello, y porque es un proyecto personal, con el que no voy a entrar en conflicto con otros desarrolladores,
he decidido usar, no solo native nesting, sino usar selectores con IDs y etiquetas genéricas como: <aside>,
<header>…
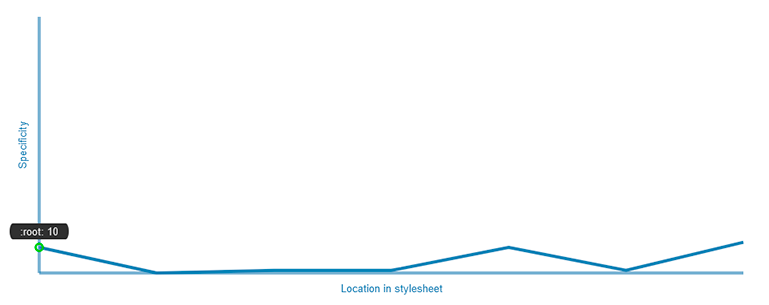
Aún así, como se puede ver en la imagen inferior, el nivel de especificidad es bajo, se puede mantener un
equilibrio entre utilidad jerárquica y código limpio y ordenado.
Componentes
Auto-creación de anchors internos
Nombre del componente: internal-anchors
Si a unas de las etiquetas usadas en los títulos (<h2>, <h3> o <h4>) se le
coloca un atributo ID, automáticamente se convierte en un enlace interno a ese título de la página.
Enlaces referenciales
Nombre del componente: pages-links
En el archivo links.json se registran enlaces con un nombre de referencia, a modo de identificador.
En las páginas del manual que lo necesiten se agrega el enlace por el nombre de referencia, así, si luego el enlace
cambia, no hay que cambiarlo en cada página donde se usó, solo hay que cambiarlo en el archivo links.json.
This project is managed with Lerna and Yarn. To get started, install Yarn and bootstrap the repo.
yarn install
You can run tests with yarn test at the top level of the project. For each package, yarn test --watch will interactively run the tests for changes since the last commit.
Before starting up the services, you will need to copy the example .env.example file to .env and config.env.example to config.env. Many of the values are optional, and most that aren’t have default values included in their .example file. Required values below:
JWT_SECRET in config.env must be set to a large random string.
PERSISTENT_DIR in .env is an absolute path to a directory that will be used to store datasets. This should be a git-annex compatible filesystem and large enough to store some test datasets.
To setup Google as an authentication provider, register a new client app and set the following variables. For development use, you will create a new Google project with oauth credentials for a JavaScript client side app. “Authorized JavaScript Origins” is set to http://localhost:9876 and “Authorized Redirect URIs” is set to http://localhost:9876/crn/auth/google/callback for a site accessible at http://localhost:9876.
# Ending in .apps.googleusercontent.com
GOOGLE_CLIENT_ID=
# 24 character secret string
GOOGLE_CLIENT_SECRET=
podman-compose is used to run a local copy of all required services together.
macOS Development Setup
If you’re working on macOS and encounter issues with file watching in Vite, use the following environment variables (in config.env):
CHOKIDAR_USEPOLLING=true
If you’re working on macOS and encounter issues with elastic search, use the following environment variables (in config.env):
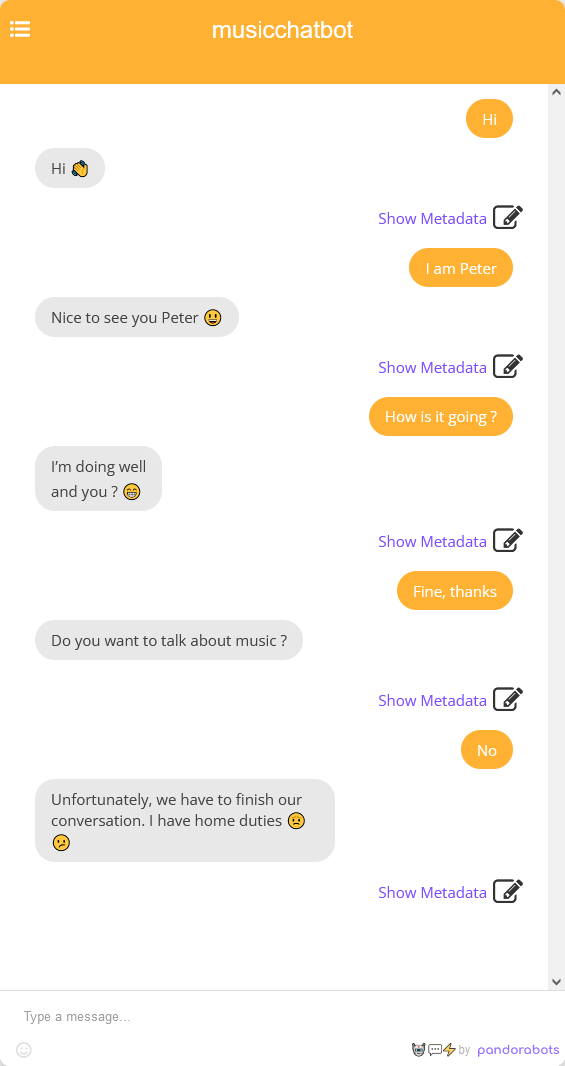
Open your code editor like Visual Studio Code If you want to write code and test ChatBot right away like me. I will recommend you to use PandoraBots website.
Start editing! 😊
If you want to send me your changes use Pull requests